A bright colorful diy watercolor box made as a labor of luv 🎨👩🏿🎨
These hands decorated a prettyful gouache watercolor box
Contents ~~~~
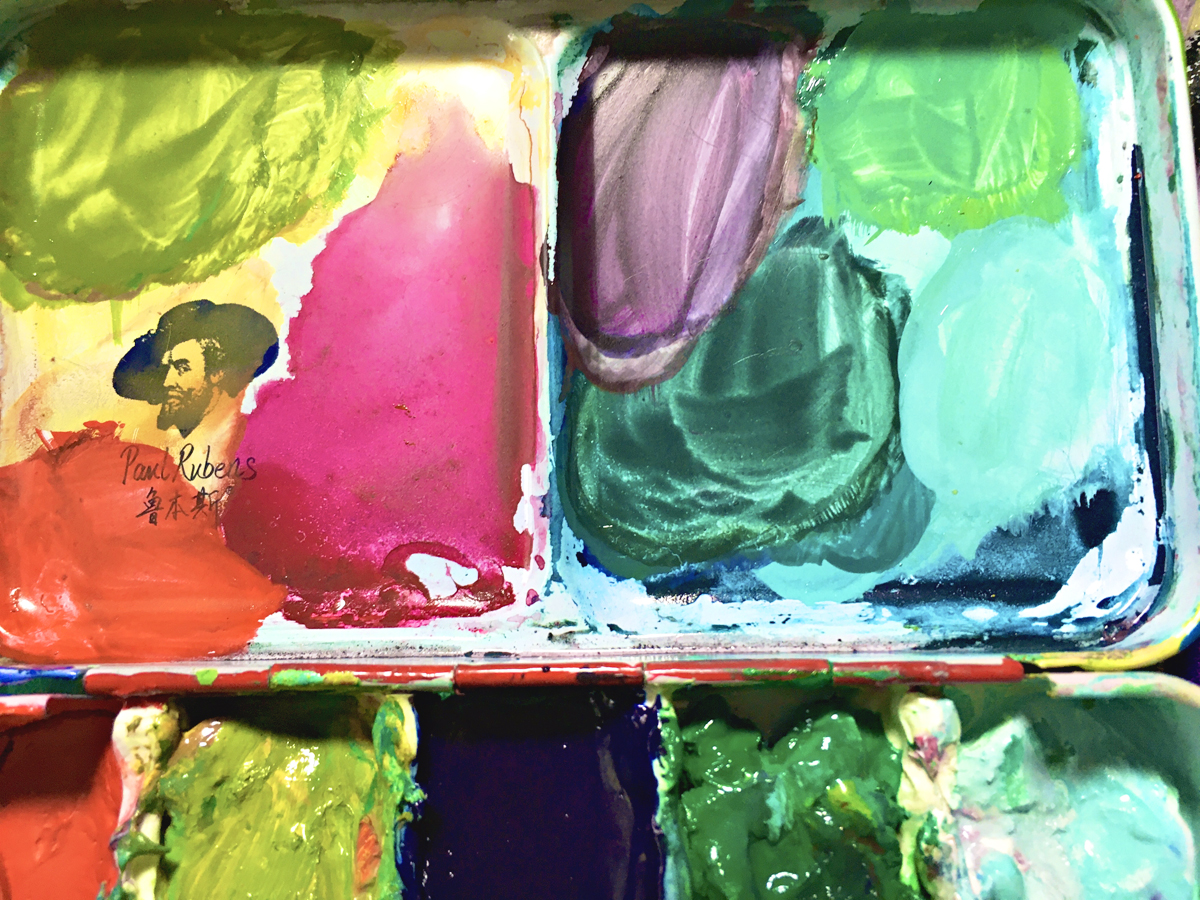
My Paul Reubens watercolors arrived sooner than I expected. I am so excited to use them. But first I need to replace the colors in the metal tin with my gouache paints. 👍🏿
I bought a wire brush and a burnisher from Amazon because I thought I would need both.
I’ve never used a metal tin before, so I was worried taking it apart would expose sharp edges. A burnisher would soften them.
Turns out it was super easy taking apart the extra flap. All I had to do was use a thumbtack to poke the hole and the hinge and the little Rod came out. 📌📌So now if I ever wanted to reattach it I could. But I don’t wanna.😅
Burnisher wasn’t needed, but the wire brush did come in handy.
When you buy a paleto that isn’t porcelain or wax based, you kinda have to scuff the service. A wire brush helps because the scuffing makes it so that the paint doesn’t bead up.
I also had to use some paint splotches and let them dry on the mixing area. Paint beads less when it attaches to more pigment. Just another reason to have a messy paleto. 🥰🎨
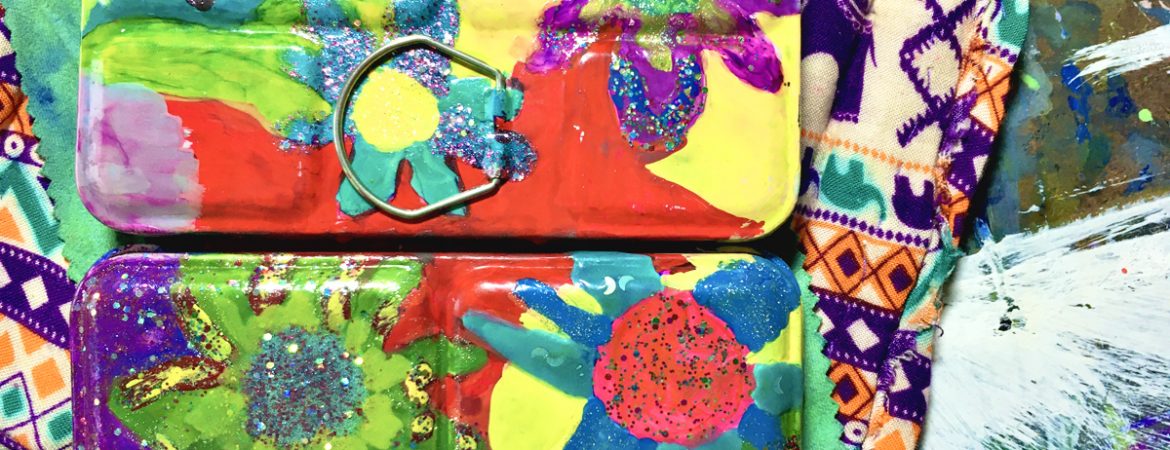
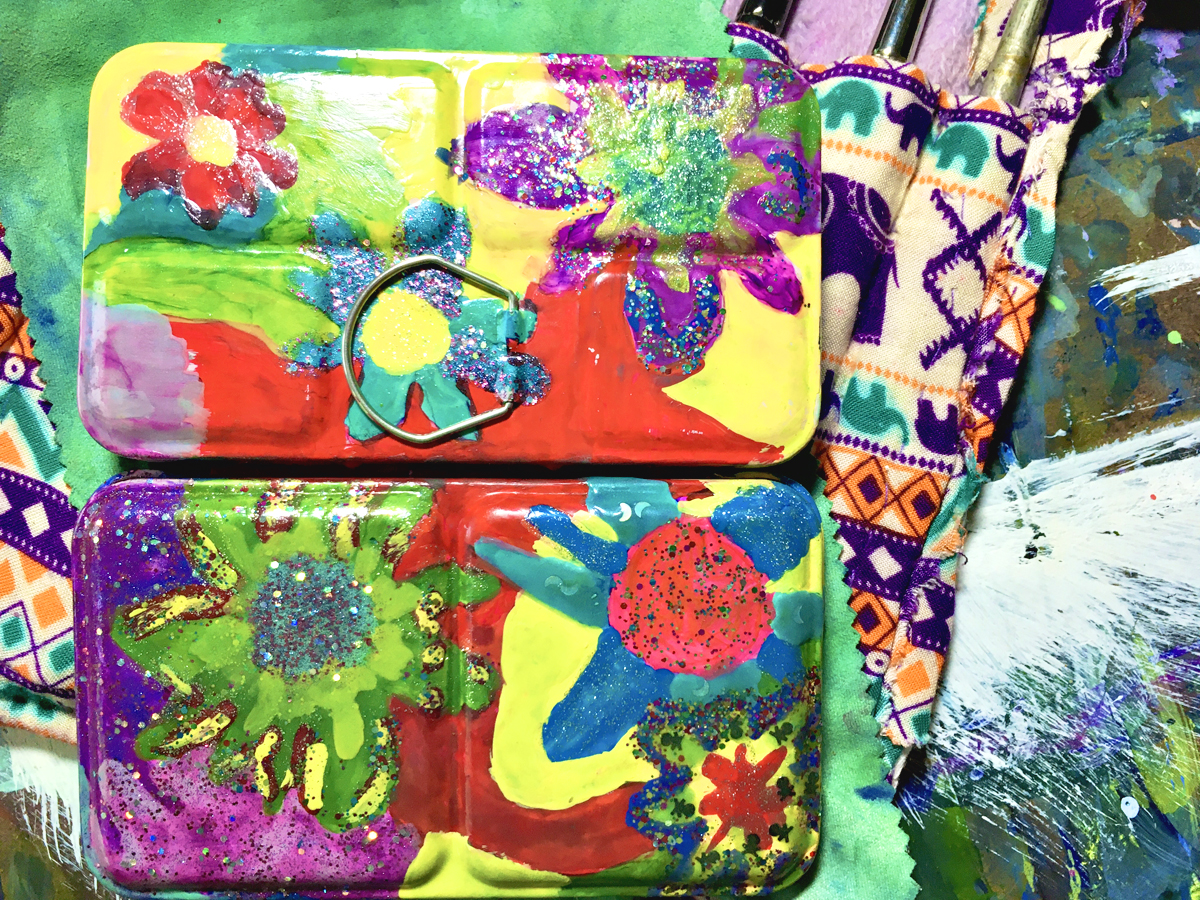
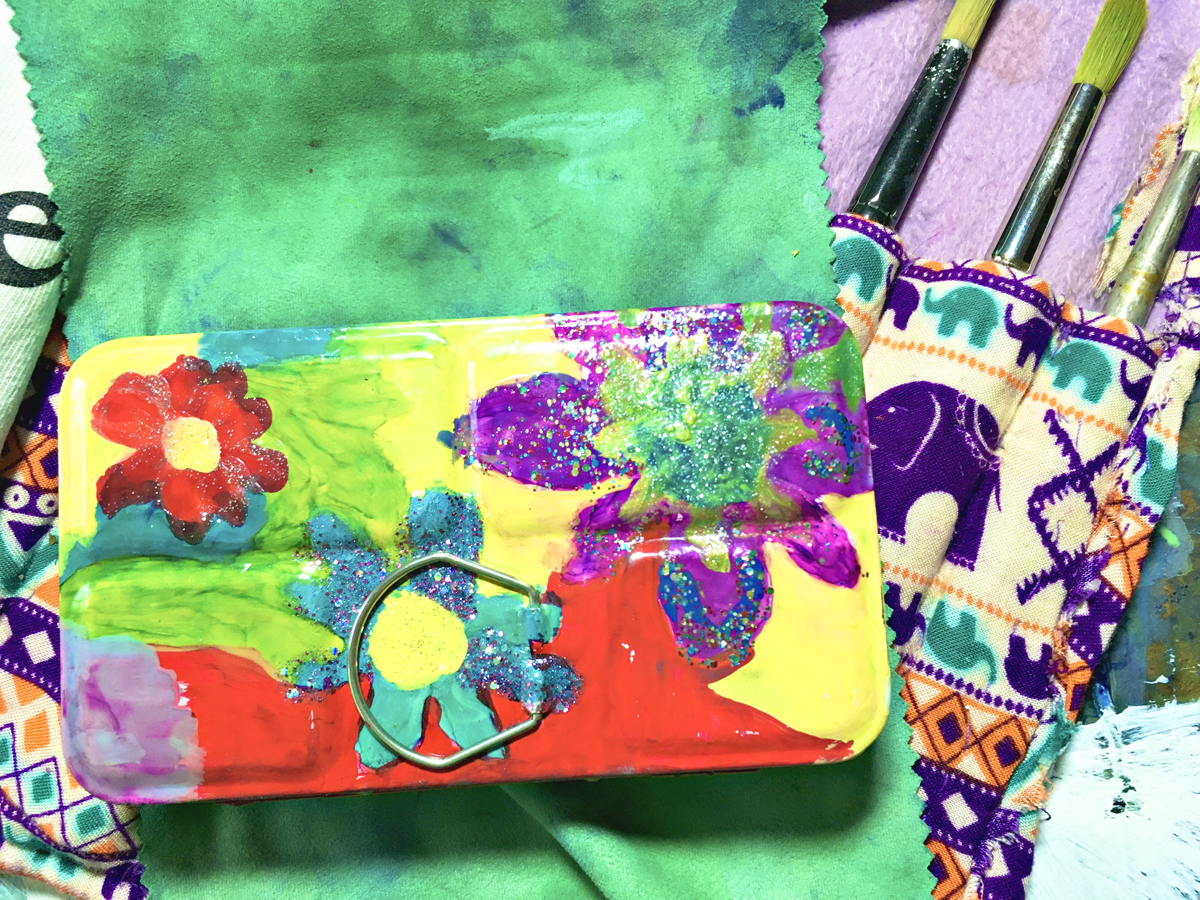
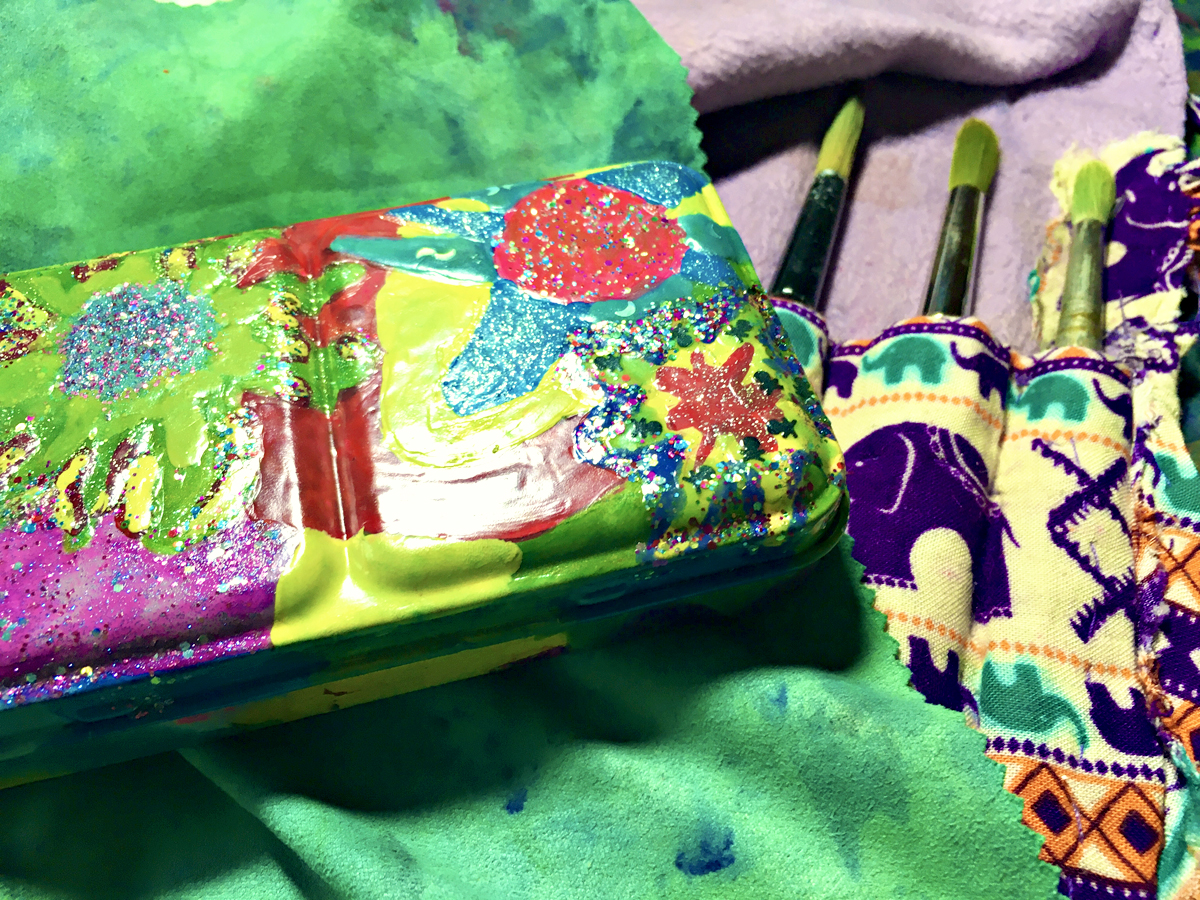
After I fixed the paint beading issue, I decided to decorate the pink tin. While I do like the pink tin, I just wanted it to look more me. I chose the Paul reubens over some of the other empty tins because I wanted watercolor paints, but also I read a lot of negative reviews on the empty tins I saw.
Paul Reubens had positive reviews all around.
What I used to decorate my metal tin watercolor box
- Nail polish
- Sharpies and copic markers
- Top coat nail polish
I was inspired by the frugal crafter to decorate my tin. 🤗 Up until that point I didn’t know you could customize tins. I never bought one because I didn’t want a plain looking one.
I wanted something that makes me happy!💚💜💛💙🧡💜❤️💖
She used alcohol inks, but the only alcohol inks I have are in the form of markers, so I used those. 🖊️🌈 I also used nail polish to create unique textures. 💅🏿 Nail polish also assures me that the inks won’t smear off.
I went with a floral pattern because spring is one of my favorite seasons. 🌺🌻 Also flowers are super colorful which match my aesthetic. 🌼
This was an ambitious project. 😪 I didn’t realize how long it would take to paint the tin, but it took about two days. 😴
Here are some things I noticed while painting:
- The markers make a squeaky sound. If that bothers you, you're better off using alcohol inks.
- Don't inhale nail polish too long. 🤣
- If you layer with nail polish, you could use glazing techniques to make luminescent colors. 🤩
- Also the rimmel london nail polish is super opaque I used this to contrast with my semi opaque sinful colors polish 💅🏿
- Experiement with top coats! 🤗 I enjoyed the glitter and glow in the dark, but there's loads of top coats to try
Time to create a tray for my watercolor decor box
Once I finished painting the tin, I removed the inside tray and got to work on creating my own tray. 👩🏿🎨
My first tray was made with glue gun sticks, but it didn’t work so well. 😅😅
It only laid down temporarily. I didn’t put glue on the edges that touched the metal enamel on all sides, so the colors were running into each other. When I tried to fix it, the whole thing came apart. 😱

So I reglued everything, this time making sure I got the edges. But after all those layers dried, it came apart. 😳
I should’ve remembered that glue gun and metal don’t mix. So I call this skeleton structure a gluegun ribcage. 🦴 🦴🦴
After a bit of googling I found out that caulking adheres to metal. They suggested I use a caulking gun, but I didn’t have one.
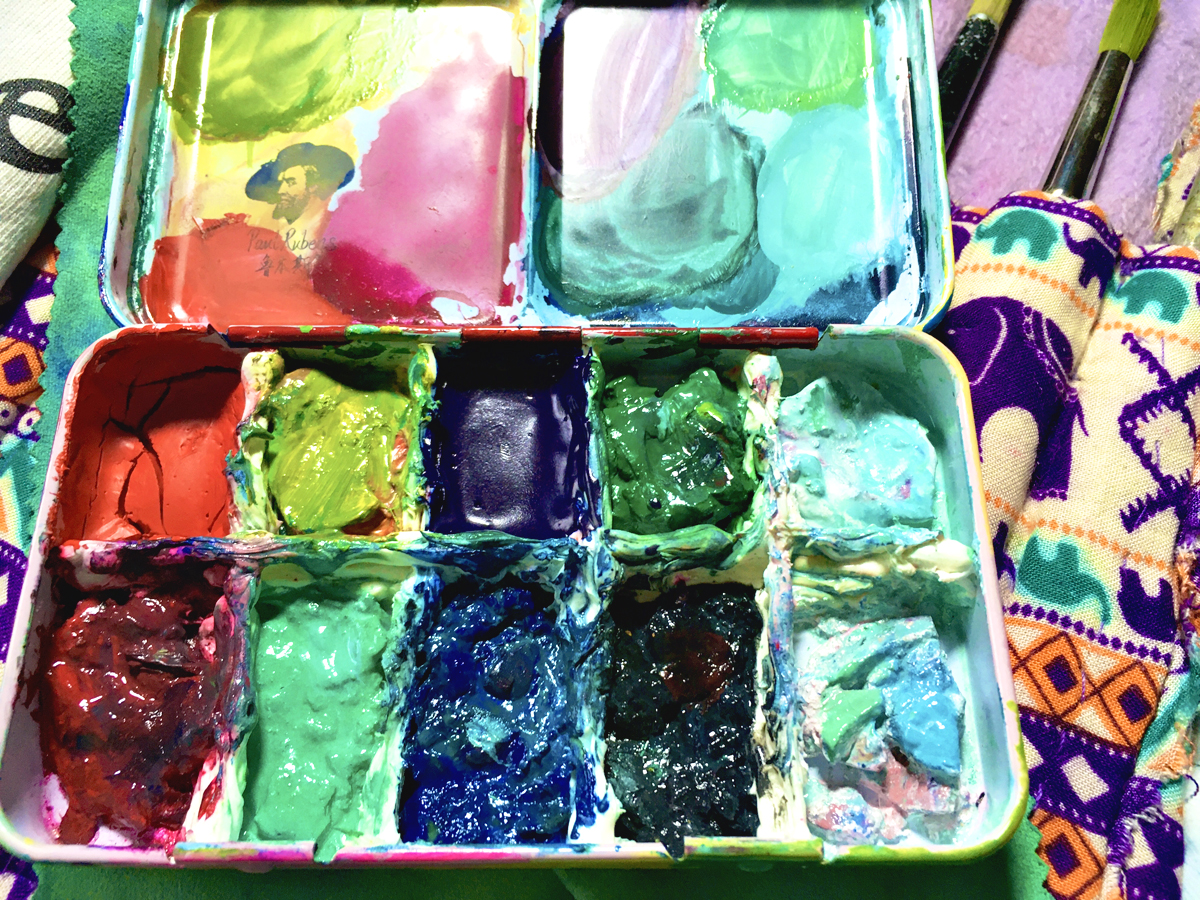
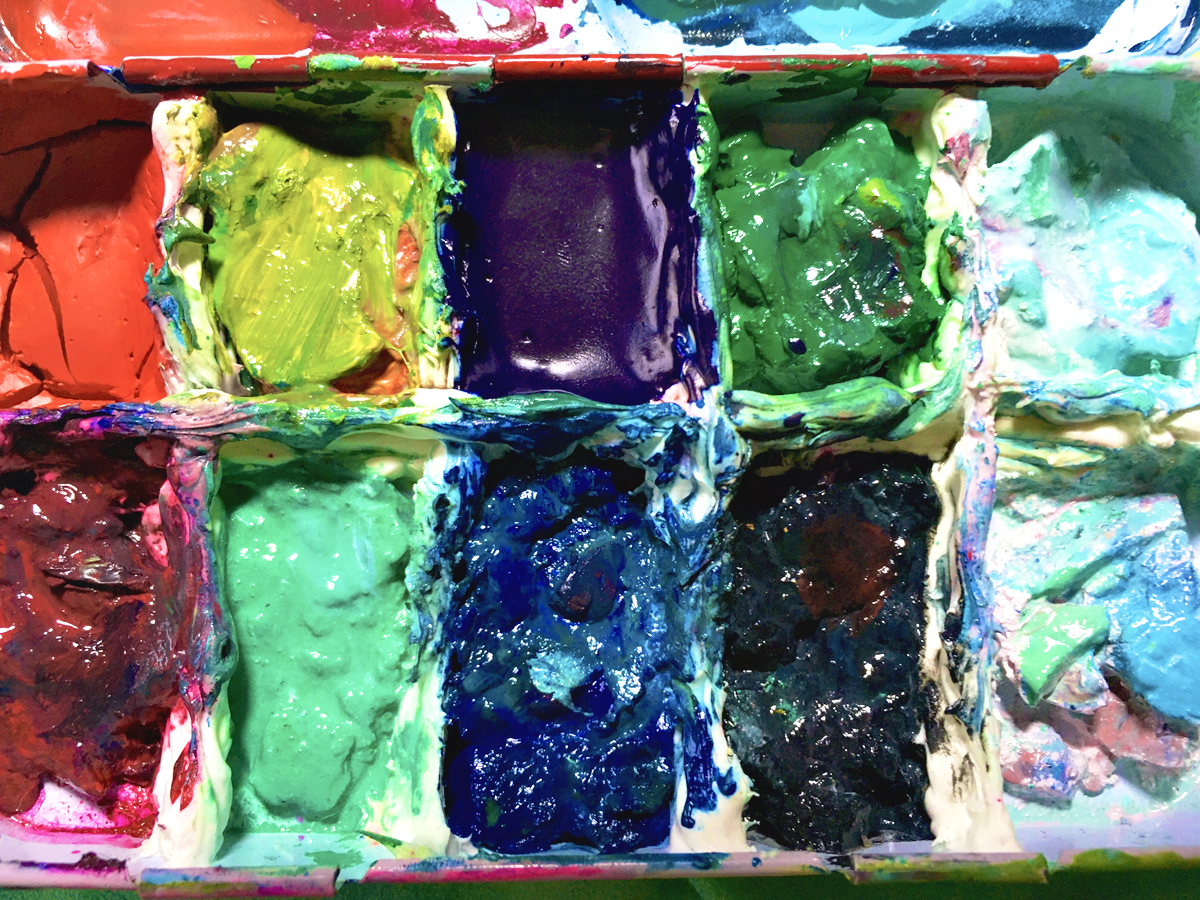
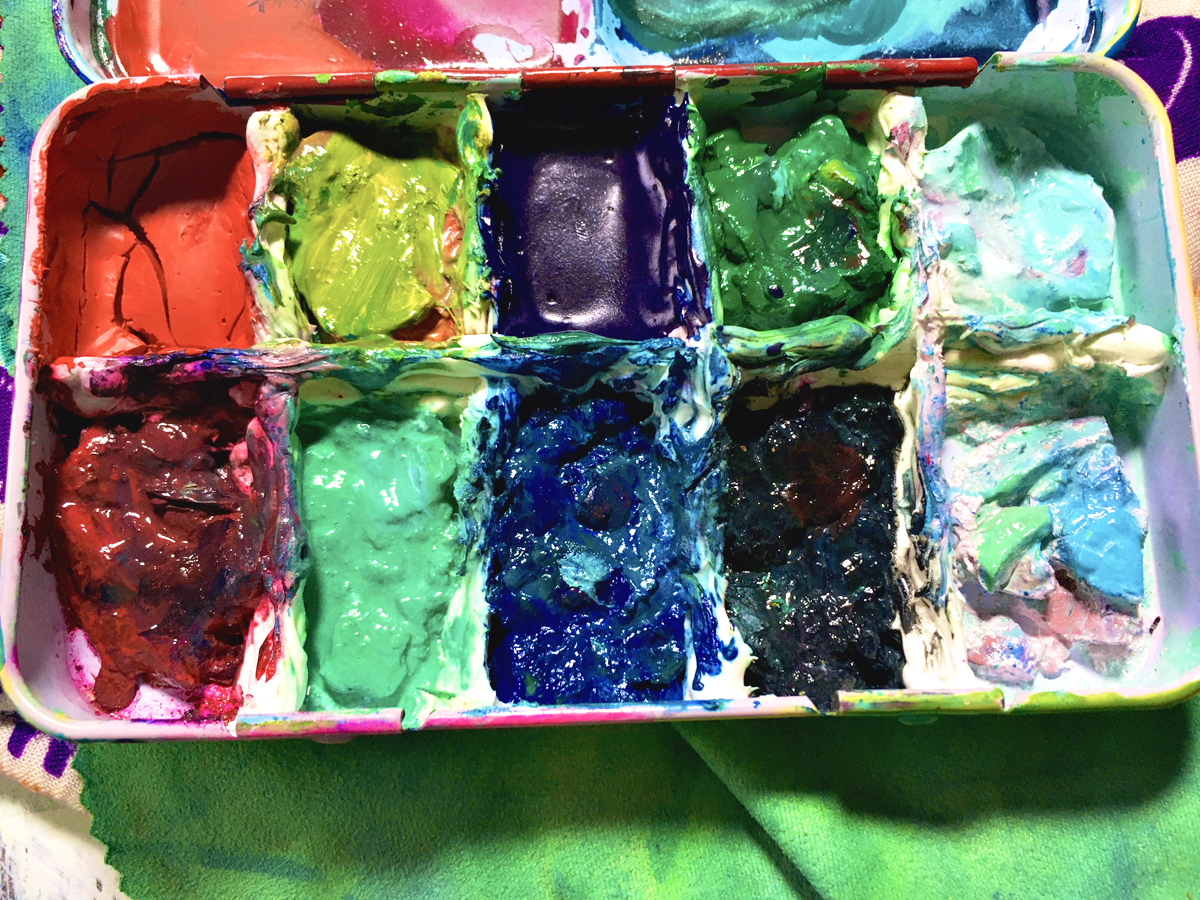
This time around I neatly spaced out the Wells. I could’ve fit twelve, but I wanted two large white Wells. Though I may be replacing zinc white and just sticking with Titanium in the future. 🧐
With that done, I used several layers of caulk. I then let it dry for about four days. 😴 I suggest getting a caulk gun because this was so tedious with my hands.
Let's try adding the colors once again 🧡💜💛💙
When that finished I moved my colors back into the wells. I got blue all over my hands which means i worked on art that day, haha! 💙💙💙 Paint all over me means I had a good time. 🤣
To get the colors to stay in the pan without cracking, use a little bit of glycerin. It helps so much. 🥰 Don’t use a ton though because the more you add, the more watercolor-like the gouache becomes. I recommend about three drops.
That was basically it! 😇👼🏿 I truly luv my tin. It makes a statement and makes me smile whenever I use it. 😍👩🏿🎨 If you have any questions about the process feel free to comment on this blog article.
What diy projects have you worked on thus far?
Video timestamps ~~~
00:00 theme song and intro
2:55 unboxing
14:08 materials
17:44 painting the back of the tin
22:09 painting the front of the tin
27:00 my chaotic workspace
38:30 outro and Bible verses
Spook your friends with this chaotic blog!
more spellbinding adventures from Blessayo
Harmonic discussions from the kreepy castle
Get a 20% off discount code
We never spam because that’s gross!